In this tutorial, we will learn how to develop a small task list cross platform mobile application using the Sling programming language. The application uses SQLite as data storage and is designed to be used on iOS and Android. The same application will execute natively on both iOS and Android, as the Sling compiler will translate your original Sling code the Java and Objective-C for Android and iOS, respectively.
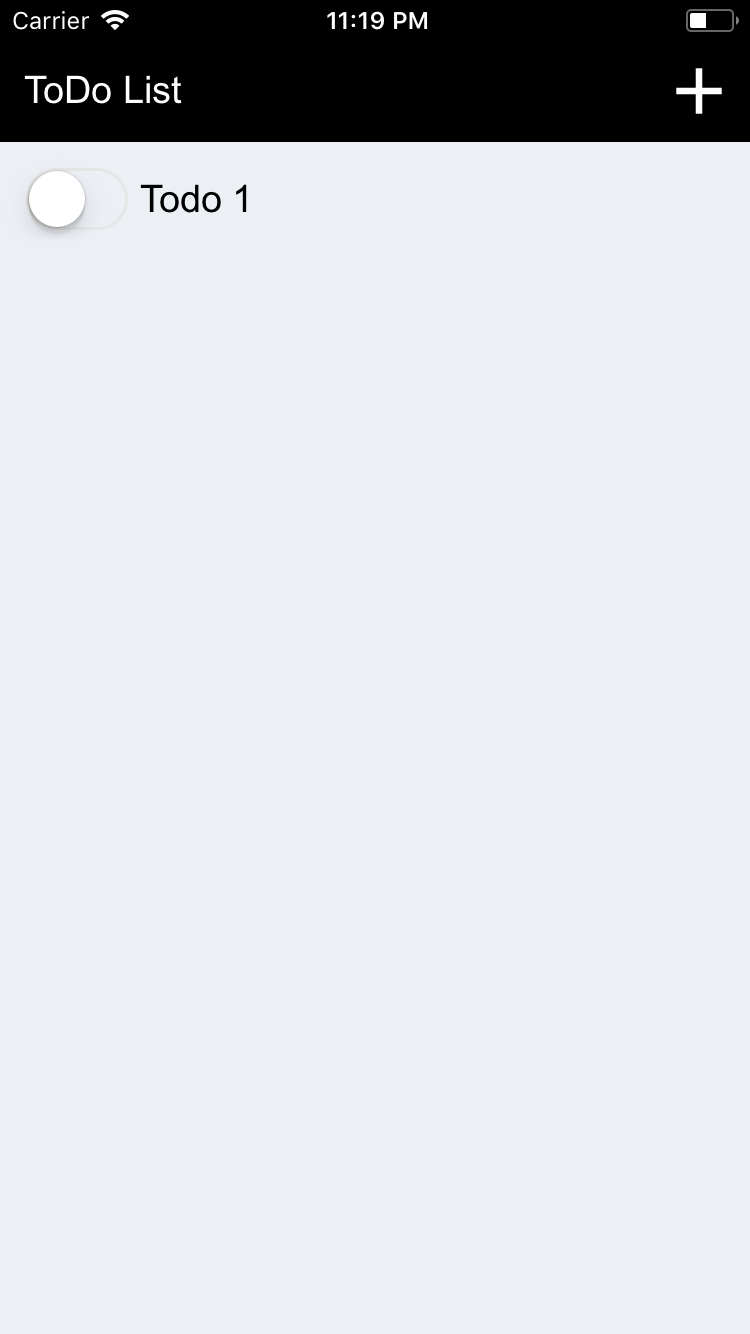
At the end of this tutorial, we will have an application that will look somewhat like this:
Development Tools
Before we proceed, we must install the Sling development tools:
Mandatory
Recommended
Sling programming with Visual Studio Code
Depending on the target platform
Compiling Sling applications for Android
Compiling Sling applications for iOS
NOTE: It is not mandatory to install or compile to both Android and iOS. If necessary, you may just pick one or the other first.
Lets get started. First, create our project directory named tasklistapp. Inside our project directory, create our Sling project file called this.pling and place the following content:
title = "Task"

preFilters += "@cape"
preFilters += "@caveui"
preFilters += "@capexDataModelSql"
Learn more about the Sling project file below:
Our project structure should like this now:
tasklistapp/
	this.pling
Create a new file inside our project directory named MainScreen.sling. The name of the file is also the class name here.
class is ScreenForWidget #screen #main:

import cave
import cave.ui

func initialize override
{
	base.initialize()
	var navi final = new NavigationWidget(context)
	navi.setWidgetEnableActionBar(false)
	setWidget(navi)
	var splash = new SplashScreenWidget(context)
	splash.setBackgroundColor(Color.white())
	splash.addSlide("eqsplash", 1500)
	splash.setDoneHandler(func {
		navi.switchWidget(new MainWidget(context))
	})
	navi.pushWidget(splash)
}
Here, the MainScreen class inherits the base class ScreenForWidget and contains the modifier #main to tell the compiler that this will be the starting point of our application. We also need to override the initialize method of our base class since we want to load our initial user interface once the app is opened. The initialize method of ScreenForWidget is equivalent/ or being called when the onCreate of android.app.Activity in Android is triggered, or the loadView in UIViewController in Objective-C for iOS.
For us to properly handle our widgets being added or being removed in our view, we want to use the NavigationWidget since this provides a better way of handling such requirements.
We also want it that our app, when launched, will open first a splash screen, which contains an image(by your choice) then after, will show our home screen.
In our initialize method in MainScreen, create an instance of a NavigationWidget then call the setWidget method of ScreenForWidget and passed the newly created instance of NavigationWidget.
func initialize override
{
	base.initialize()
	var navi final = new NavigationWidget(context)
	navi.setWidgetEnableActionBar(false)
	setWidget(navi)
}
Now let's create our splash screen. Inside our initialize method, create an instance of a SplashScreenWidget and add the following:
var splash = new SplashScreenWidget(context)
splash.setBackgroundColor(Color.white())
splash.addSlide("eqsplash", 1500)
navi.pushWidget(splash)
Here, we set the backgroundColor of our SplashScreenWidget to white, called the method addSlide of SplashScreenWidget(first parameter is for the image resource to be displayed, second parameter is for the time duration it will be displayed in millisecond). Then lastly, we have added our SplashScreenWidget (or pushed it) on our NavigationWidget. Now since we are using an image to our app, we want to include the location for our image resources, to do this, modify our project file(this.pling) and add the following:
resources = [ "images" ]
With this, it will now look the eqsplash image inside the images directory. Note that the images directory should be inside our app directory.
With this modifications, this will just display the eqsplash image once the app is launched, but what we want is after the splash screen is displayed, we want to load our home screen.
Create a file named "MainWidget.sling", this will act as our home screen. We will be using UI expression on creating it's user interface.
Using UI expression on MainWidget class, it should look something like this as shown below:
class #widget:

ui NavigationWidget
{
	backgroundColor = Color.instance("#ecf0f5")
	actionBarBackgroundColor = Color.black()
	actionBarTextColor = Color.white()
}

// image resource that is being returned here will be added as an image button in the right side of our actionbar.
func getAppIconResource override as string:
	return "add"

// function being returned here will be called when the appIconResource is tapped in the actionbar.
func getAppMenuHandler override as function
{
	return(func {
		;
	})
}

// widget being returned here will be displayed as the initial widget on this NavigationWidget instance.
func createMainWidget override as Widget:
	return LabelWidget.forText("Hello World")
Now we want our MainWidget to show our initial widget, which is a list of tasks. Create a file named "TaskListWidget.sling" and place the following content:
class is TitledWidget #widget:

ui LayerWidget
{
	VerticalScrollerWidget {
		VerticalBoxWidget vbox {
			spacing = context.getHeightValue("2000um")
			margin = context.getHeightValue("2000um")
		}
	}
}

func getWidgetTitle as string:
	return "Task List"
In the case above, our TaskListWidget is a LayerWidget. The VerticalBoxWidget will handle our list, while placing it inside a VerticalScrollerWidget will enable it to become scrollable. It also implements the interface TitledWidget, so any string that will be returned in the method getWidgetTitle, will be place as the actionbar text.
Going back to our MainWidget class, replace the content of createMainWidget and instead, return an instance of TaskListWidget as shown below:
func createMainWidget override as Widget:
	return new TaskListWidget(context)
TaskListWidget is just a container of our list of tasks, we still need to create a widget which will define the look of each item displayed inside TaskListWidget, to do this, create a file named "TaskItemWidget.sling".
class #widget:

ui HorizontalBoxWidget
{
	CheckBoxWidget check {
	}
	LabelWidget text : 1.0 {
	}
}

ctor(ctx as GuiApplicationContext)
{
	base(ctx)
	forceCreateWidget()
}
As shown above, our task list item will contain the following: a checkbox, which will enable the user to check if a task is completed, a label, which will display the task list name.
Now that we have a container for our list, a widget for our task list items, we now need to create the screen on which the user will actually be creating the task. Create a file named "AddTaskWidget.sling"
class is TitledWidget #widget:

ui VerticalBoxWidget
{
	spacing = context.getHeightValue("2000um")
	margin = context.getHeightValue("2000um")
	TextInputWidget title {
		placeholder = "Enter todo title"
		padding = context.getHeightValue("1000um")
		backgroundColor = Color.white()
	}
	HorizontalBoxWidget {
		spacing = context.getHeightValue("1000um")
		TextButtonWidget btnCancel : 1.0 {
			text = "Cancel"
			padding = context.getHeightValue("1000um")
			backgroundColor = Color.instance("#D91E18")
			clickHandler = func {
				onCancelClicked()
			}
		}
		TextButtonWidget btnSave : 1.0 {
			text = "Save"
			padding = context.getHeightValue("1000um")
			backgroundColor = Color.instance("#444444")
			clickHandler = func {
				onSaveClicked()
			}
		}
	}
}

func getWidgetTitle as string:
	return "Add Item"

func onCancelClicked:
	NavigationWidget.popFromContainer(this)

func onSaveClicked
{
	// Code for saving data to the database
}
In the code above, we have our container widget which is VerticalBoxWidget, on which it has the following:
a input which will accept the task inputted by the user
save button on which once clicked, it will call the method onSaveClicked
cancel button, when clicked, will pop(or removed) the current widget from the stack of widgets in our NavigationWidget
Modify our MainWidget class and inside the getAppMenuHandler method, push an instance of the newly created class AddTaskWidget to the NavigationWidget as shown below:
func getAppMenuHandler override as function
{
	return(func {
		pushWidget(new AddTaskWidget(context))
	})
}
Take note that here, we have used the method pushWidget since the class MainWidget inherits the NavigationWidget, on which this method is declared.
SQLite Database Integration
We want the user to be able to manage the different tasks that will be created, so we want our data to be saved on a database, on this case, we will be using SQLite.
To initialize our database, modify our MainScreen class so we could read an sqlite file and create an instance of SQLiteDatabase object. Add the following code inside our initialize method but make sure this code is executed first.
assert String.isNotEmpty(VALUE "database"):
	ERROR "Unknown database connection"
var ff = assert ApplicationData.retrieveFile(context, VALUE "database")
var database = assert SQLiteDatabase.forFile(ff, true, context)
The VALUE keyword is used to set values of preprocessor variables within the code as string literals. You can specify the value of this database variable in our project file(this.pling) by doing this:
defines = {
	"database" : "taskdb"
}
The ApplicationData class is a helper class in our JKOP Framework that will allow us to easily retrieve( or create a file if it does not exist) in the application's data directory. We also created an instance of our database by using the SQLiteDatabase class.
Data Models
We will be using data models to represent our database tables in our application. Learn more about data models:
Create a file named "TaskModel.sling" and place the following properties:
class #dataModel:

const MODEL_NAME = "todos"

const PENDING = 0
const DONE = 1

prop id as string #primary #dataField
prop title as string #dataField
prop status as int #dataField #index
prop timeStamp as long #dataField

func onInsert #onInsert
{
	id = "T-" .. String.forLongInteger(SystemClock.asSeconds())
	status = PENDING
	timeStamp = SystemClock.asSeconds()
}
Note the #dataModel custom modifier. This tells the compiler that the class TaskModel is a data model and it will automatically generate SQL code to store and retrieve data to/from a database. The data model TaskModel has the following properties:
id - which will act as the primary key in our table by specifying the #primary modifier
title - title of the task
status - status of the task, either pending or done
timeStamp - the current Unix time when the task is created
NOTE: #dataField tells the compiler that this property will be a table column
Using the #onInsert modifier in our method onInsert, this will be called prior to inserting the data to the database, the purpose of this method is that we want the id, status, and timeStamp columns to have generated values as shown.
Now let's create a file named "DataManager.sling", this should handle our database transactions from initializing tables, creating, updating, deleting and even getting records from the database.
class:

import capex.data
import capex.crypto

var db private static as SQLiteDatabase
var ctx private static as LoggingContext

func initialize(database as SQLiteDatabase, context as LoggingContext) static as bool
{
	assert database:
		Log.error(context, "SQLite database object is null")
	db = database
	ctx = context
	db.ensureTableExists(TaskModel.SQL.getTableInfo(TaskModel.MODEL_NAME))
	return true
}
As you can see, the initialize static method accepts an instance of SQLiteDatabase, which will set the reference of our database to our static class variable db, then calls the ensureTableExists to ensure the task database table exists.
Now we want to have database operations, to do this, add the following:
Storing data to our database
func addTask(data as DynamicMap, callback as function<void, bool>) static
{
	assert callback
	assert data:
		callback(false)
	var cb final = callback
	TaskModel.SQL.insert(db, TaskModel.MODEL_NAME, TaskModel.forDynamicMap(data), func(success as bool) {
		cb(success)
	})
}
Updating data in the database
func updateTask(data as DynamicMap, callback as function<void, bool>) static
{
	assert data
	assert callback
	var cb final = callback
	TaskModel.SQL.update(db, TaskModel.MODEL_NAME, TaskModel.forDynamicMap(data), func(success as bool) {
		cb(success)
	})
}
Deleting data in the database
func deleteTask(data as DynamicMap, callback as function<void, bool>) static
{
	assert data
	assert callback
	var cb final = callback
	TaskModel.SQL.deleteFromTable(db, TaskModel.MODEL_NAME, TaskModel.forDynamicMap(data), func(success as bool) {
		cb(success)
	})
}
Retrieving task by status in the database
func getTaskByStatus(status as int, callback as function<void, DynamicVector>) static
{
	assert callback
	var cb final = callback
	TaskModel.SQL.queryByStatus(db, TaskModel.MODEL_NAME, status, 0, 0, [ SQLOrderingRule.forAscending("timeStamp") ], func(itr as Iterator<TaskModel>) {
		assert itr:
			cb(null)
		var dv = new DynamicVector()
		loop {
			var t = itr.next() as TaskModel
			if not t:
				break
			dv.append(t.toDynamicMap())
		}
		cb(dv)
	})
}
Retrieving the list of task in the database
func getTasks(callback as function<void, DynamicVector>) static
{
	assert callback
	var cb final = callback
	TaskModel.SQL.queryAll(db, TaskModel.MODEL_NAME, [ SQLOrderingRule.forAscending("timeStamp") ], func(itr as Iterator<TaskModel>) {
		assert itr:
			cb(null)
		var dv = new DynamicVector()
		loop {
			var t = itr.next() as TaskModel
			if not t:
				break
			dv.append(t.toDynamicMap())
		}
		cb(dv)
	})
}
Now we want to use our DataManager class in our application widgets, to do this, first modify our MainScreen and add the following code after initializing the database:
DataManager.initialize(database, context)
In our AddTaskWidget, modifiy the onSaveClicked method so that it will call the addTask method of DataManager as shown below:
func onSaveClicked
{
	var ctx final = context
	var thisWidget final = this
	var v = new DynamicMap()
	v.set("title", title.getWidgetText())
	DataManager.addTask(v, func(v as bool) {
		assert v:
			ctx.showErrorDialog("Failed to save item")
		ctx.showMessageDialog("Success", "Item has been added to the database.", func {
			NavigationWidget.popFromContainer(thisWidget)
		})
	})
}
Edit our TaskListWidget class and implement the interface DisplayAwareWidget
class is TitledWidget is DisplayAwareWidget #widget:

ui LayerWidget
{
	VerticalScrollerWidget {
		VerticalBoxWidget vbox {
			spacing = context.getHeightValue("2000um")
			margin = context.getHeightValue("2000um")
		}
	}
}

func getWidgetTitle as string:
	return "Task List"

func onWidgetDisplayed
{
}
Create a method called "onGetItems" in our TaskListWidget. This method will fetch records from the database by calling the getTaskByStatus method of DataManager. Then call the onGetItems method in our onWidgetDisplayed method.
func onWidgetDisplayed:
	onGetItems()

func onGetItems
{
	var h final = func {
		onGetItems()
	}
	Widget.removeChildrenOf(vbox)
	DataManager.getTaskByStatus(TaskModel.PENDING, func(todos as DynamicVector) {
		assert todos:
			onNoDataFound()
		if todos.getSize() < 1 {
			onNoDataFound()
			return
		}
		foreach d as DynamicMap in todos.toVector():
			vbox.addWidget(new TaskItemWidget(context))
	})
}

func onNoDataFound:
	vbox.addWidget(AlignWidget.forWidget(context, LabelWidget.forText(context, "No data found")))
Now, we want our TaskItemWidget to display the actual title of the task retrieved from the database. Let's add a setWidgetData method and declare a class variable named data with a datatype of DynamicMap in our TaskItemWidget class.
var data as DynamicMap

func setWidgetData(value as DynamicMap) as this
{
	assert value
	data = value
	text.setWidgetText(value.getString("title"))
	return this
}
Then modify our TaskItemWidget onGetItems method, so that every instance of TaskListItemWidget added on the VerticalBoxWidget, it will also pass the task data to the widget by calling setWidgetData.
foreach d as DynamicMap in todos.toVector():
	vbox.addWidget(new TaskItemWidget(context).setWidgetData(d))
We also want that when the user checks a task, we will update the database and set the task status to done, we can do this by modifying the TaskItemWidget as follows:
ui HorizontalBoxWidget
{
	CheckBoxWidget chk {
		checkHandler = func {
			onUpdateItem()
		}
	}
	LabelWidget text : 1.0 {
	}
}
You can notice above the we have added a checkHandler to our CheckBoxWidget, this will be called every time the user checks/unchecks the checkbox. Now let's create the onUpdateItem method and place the following code:
func onUpdateItem
{
	var ctx final = context
	ctx.showConfirmDialog("Confirmation", "Are you sure you want this to mark as done?", func {
		var data = new DynamicMap()
		data.set("status", TaskModel.DONE)
		DataManager.updateTask(data, func(success as bool) {
			assert success:
				ctx.showErrorDialog("Failed to update item")
			ctx.showMessageDialog("Success", "Item has been updated", func {
				if widgetOnUpdateHandler:
					widgetOnUpdateHandler()
			})
		})
	}, null)
}
You can notice that we have this variable called widgetOnUpdateHandler, this will be a property(with function datatype) in our TaskItemWidget for the purpose of when a successful update has been done, this function will be triggered if set. So add this property in our TaskItemWidget as shown below:
prop widgetOnUpdateHandler as function
We also want our user to be able to delete task, let's create a method named "onDeleteItem" and place the following:
func onDeleteItem
{
	var ctx final = context
	ctx.showConfirmDialog("Confirmation", "Are you sure you want to delete this item?", func {
		DataManager.deleteTask(data, func(success as bool) {
			assert success:
				ctx.showErrorDialog("Failed to update item")
			ctx.showMessageDialog("Success", "Item has been deleted", func {
				if widgetOnUpdateHandler:
					widgetOnUpdateHandler()
			})
		})
	}, null)
}
We want this method to be called every time the user performs a long press to a list item. Override the initializeWidget method of our TaskItemWidget class, and set a long click handler as shown below:
func initializeWidget override
{
	base.initializeWidget()
	Widget.setWidgetLongClickHandler(this, func {
		onDeleteItem()
	})
}
Now, all we need to do is to compile the code using eqela command line tools, create a file named build.qx. We will doing build automation with qx scripts. For reference, take a look at this:
Place the following content in our build.qx file.
use eqela:slingbuild:r19
use eqela:builder:r4

buildAndroid : src androidSdkPath gradlePath {
	requireValue src
	requireValue androidSdkPath
	requireValue gradlePath
	set id ${=getIdNameForPath(${src})}
	eqela:slingbuild buildAndroid src=${src}
	eqela:builder build/${id}/android/src/ -output=build/${id}/android/bin -androidSdkPath=${androidSdkPath} -gradlePath=${gradlePath}
}

buildIos : src {
	eqela:slingbuild buildIos src=${src}
}
Note that for compatibility issues, we recommend to use Gradle 3.5.1 version for android builds.
Then execute this command to compile for target android
eqela build.qx buildAndroid src=tasklistapp androidSdkPath=<path-to-androidSdk> gradlePath=<path-to-gradle>
and this command for target iOS
eqela build.qx buildIos src=todoapp
Once compiled, the application should look like this in iOS